This site is no longer active or maintained. It is an archive of trainings 2013-2019 at Pu'u Kukui Elementary School.
iMovie and PhotoBooth (with Chris Coffelt)
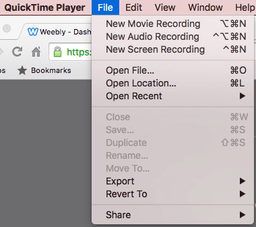
QuickTime Player - simple tool (built into your Mac) for creating recordings - useful for reading fluency.
- New Movie Recording - If you have an iPad or a camera connected you can use it as an external camera. (USB-lightning cable). The lettering will be correct and not reversed.
- New Audio Recording - good for reading or recording a track for iMovie
- New Screen Recording - Click to record full screen or drag to record part of the screen.
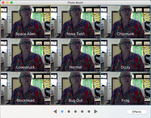
Photo Booth - Kids find this and then everyone wants to use it.
- Good for fluency
- Set up to record video for iMovie - Effects to set background. If you move your computer you'll need to quit and reset it again.
- User backdrops - If students are studying a certain topic this might be useful. You can go to the Effects and scroll to the last page and then drag in your own images and videos to create a custom backdrop
- Can bring in an image of green for a green screen so you don't need to stand in front of the green screen
- Be sure to choose the right button in the bottom left hand corner of PhotoBooth to indicate what you're doing (images or video)
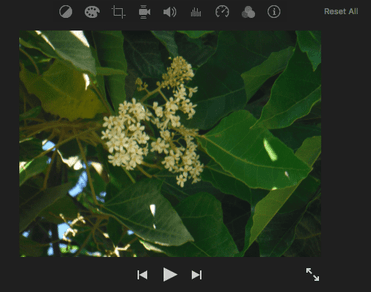
iMovie - iMovie saves as you work on your project. You can bring in a variety of media and use it to create projects that can then be exported and shared.
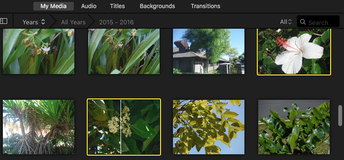
- Media - This is where the media that you use in your movie is stored. You'll see your Photos library, your Events, and an iMovie library.
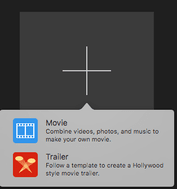
- Projects - Start here and click New and choose Movie or Trailer. Or you can click on Projects to view the projects that you've created.
- Trailers are precreated story templates that you fill in with text and images. Provides guidance but you want to preview them before having students use them. Can customize trailers by converting them to iMovie
- Outline - You can customize the inserts and they will be used with the movie.
- Storyboard - Shows the shots that you need (along with changable titles)
- Shotlist - List of clips that need to be captured
- Trailers are precreated story templates that you fill in with text and images. Provides guidance but you want to preview them before having students use them. Can customize trailers by converting them to iMovie
- Movies - students manually create. You can add themes at a later time and it will apply themes and music that is associated with the theme.
- Top of the window (My Media, Audio, Titles, Backgrounds, Transitions)
- Bottom of the screen - drag and drop clips into the timeline
- Encourage students to storyboard before they gather images and video (have a plan in place)
- Here's what we did in the timeline (bottom half of the window)
- Backgrounds - blue marble globe to set the location - drag the slider to adjust the length of the clip
- Add image and put a title above it
- To add images/clips click on the arrow at the top left hand corner of the window
- To modify a clip you can doubleclick on it
- Add audio
- Share
- Theatre - is a presentation environment where you can view high quality versions of your movies. It is designed to work with iCloud if you have an account. Your movies are private and associated with your iCloud account.
Adding clips to your project (if they are already in your Media library)
- to add clips you click on My Media and choose the clips that you want to use (from your media libraries) and then you drag them to the timeline in the bottom of the window (hold down the command key while clicking on clips to choose more than one clip)

Addimages images / clips - if they are not in your Media Libraries
- click on the arrow in the upper left hand corner of the window to import images and
clips from your desktop - can also import directly from the computer camera or whatever device is connected to the computer
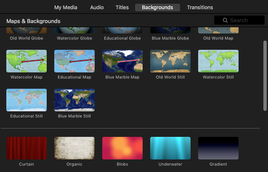
Backgrounds
- click the backgrounds tab to choose a background image (scroll through the images to choose)

Titles
- you can add a title on top of an image or you can have the title show on top of a solid color
- you can adjust the length of the title by dragging the slider
- doubleclicking on the transition will let you edit it (color, size, font)
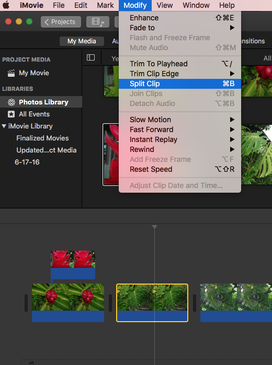
Select parts of the clip
- can split clips by adjusting the playhead (Modify > Split)
- to split a clip be sure to select the clip and then position the playhead where you want to split the clip - then you can go to the Modify menu to split the clip. Throw away (delete) the part you don't want
- to adjust the length of the clip you can also adjust the double arrow slider at either end of the clip
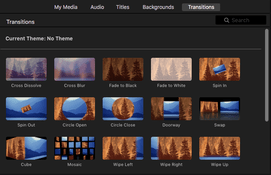
Transitions
- add by dragging between clips (use carefully)
- think about which transitions would make sense (circle open for the beginning
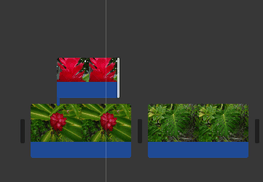
Picture in picture and cutaways
- drag another image or video clip to the space above a clip and then you can adjust it as a cutaway, green/blue screen, split screen or picture in picture
- can import green screen from Photo Booth
Modify clips/titles etc.
- highlight a clip by clicking on it
- use the tabs and controls at the top right hand corner of the screen to make adjustments to clip
- you can control
- color, white balance, skin tone balance
- color - temperature
- cropping - fit, crop to fit, Ken Burns effect
- stabilizing
- volume (lower volume on tracks), fade in and out
- audio equalizer and noise reduction
- speed, pitch and direction
- filters applied to clips
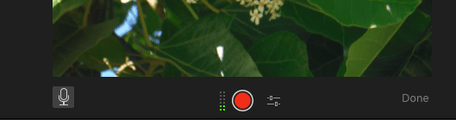
Microphone
- adds a track for voiceover
- there is a countdown
- meters to see how loud the recording is
- you can use external microphones
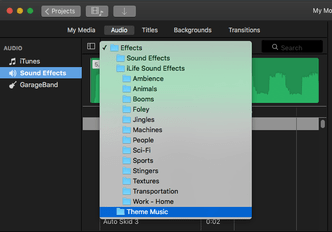
Adding Audio
- you can add multiple tracks of audio
- narration (voice over) - click on the microphone - you will be given a 3 second count down before recording begins
- sound effects - click on the Audio tab in the top left corner and you'll be able to pull music from iTunes, Sound Effects or from Garage Band
- background music - you can pull from the Audio tab or drag from your computer directly below the video track
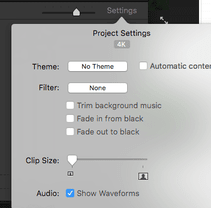
Changing the theme
- click on the settings button and you can make changes to the theme of your project and adjust other settings.
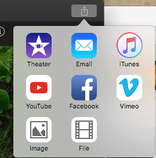
Sharing
- several options
- share to a file (can select resolution and size)
